Picture this: you’re on a tight deadline, moving heavy pallets across a warehouse when suddenly the lift chain starts jerking. The entire mast shudders with every inch of lift, and your operator radios in a headache of a noise coming from the carriage. You check the suspect area and immediately spot it—a CAT2 Bushing has worn down to a sliver, metal grinding against metal. Knowing How to replace a worn CAT2 bushing step by step? can mean the difference between a quick five‑minute fix and hours of unplanned downtime that costs you thousands. Even if you’re a seasoned procurement manager who never touches a wrench, understanding this repair lets you source the right parts faster, approve maintenance budgets confidently, and avoid giving a green light to low‑quality imitations that fail within weeks. At Raydafon Technology Group Co.,Limited, we’ve guided hundreds of fleet managers through this exact scenario, supplying factory‑direct CAT2 bushings that meet or exceed OEM fitness specs so your equipment keeps running smoothly.
Imagine your forklift mast twisting slightly every time the truck turns with a heavy load. That repeated micro‑flexing, coupled with impact loads from dock plates, creates a brutal environment for the CAT2 bushing. Most failures trace back to three hidden culprits: inadequate lubrication intervals, side‑loading beyond the attachment’s design rating, and—more often than you’d think—counterfeit bushings machined from material that lacks the necessary yield strength. One supply chain manager told us he was replacing the same bushing every 150 hours until he switched to a heat‑treated, precision‑ground option. The root cause? The old part deformed plastically under peak pressure, opening up a clearance gap that accelerated wear into a death spiral.
Raydafon Technology Group Co.,Limited addresses this nightmare from the engineering level. Our CAT2 bushings are forged from a proprietary alloy that balances surface hardness with core ductility, meaning the bushing resists galling without turning brittle. Paired with a consistent radius at the chamfer edge, they eliminate the sharp stress risers that crack bargain‑basement substitutes. If you’re tired of seeing your maintenance budget swallowed by repeat failures, it’s time to spec a bushing built for the real‑world abuse your fleet dishes out.
| Failure Indicator | Likely Cause | Raydafon Solution |
|---|---|---|
| Excessive clearance within 100 hours | Soft low‑carbon steel bushing | Full‑hardness alloy, core >32 HRC |
| Step wear groove on one side | Misalignment or side‑load | Precision‑ground OD/ID within 0.02 mm concentricity |
| Crack radiating from chamfer | Stress concentration at sharp corner | Controlled‑radius edge to eliminate notch effect |
You’ve just received an urgent work order—forklift #12 sounds like a rock crusher every time the mast extends. The production supervisor is hovering, and you know the CAT2 bushing is shot. Before you touch a single bolt, pause and collect everything you’ll need. Rushing into the repair without the right components is how busy technicians end up reusing deformed snap rings or forcing mismatched pins, turning a straightforward swap into a full‑day rebuild.
Here’s the non‑negotiable kit that makes How to replace a worn CAT2 bushing step by step? a predictable job rather than a fire drill. At Raydafon Technology Group Co.,Limited, we ship every replacement bushing with a matched retaining pin and new retaining hardware in a sealed pack, so you never have to wonder about alloy compatibility or pre‑existing wear patterns transferring onto your fresh bushing.
| Item | Specification | Why It Matters |
|---|---|---|
| CAT2 bushing | OD tolerance h7, surface finish Ra 0.8 | Prevents unwanted press‑fit stress |
| Retaining pin | Induction‑hardened ends | Resists mushrooming under impact |
| Driver/sleeve kit | Stepped design matching OD | Installs bushing square without cocking |
| Micrometer or bore gauge | 0.01 mm resolution | Verifies housing is still serviceable |
| Assembly lubricant | Molybdenum disulfide paste | Prevents galling on initial rotation |
You glance at the clock—fifteen minutes until the afternoon shift starts. Your heart rate ticks up a notch because a massive roll of steel is suspended three meters in the air, and the faulty bushing is right at the pivot carrying all that weight. Never, ever ignore lockout/tagout in this moment. Engage the mast chock, lower the forks onto solid cribbing, and bleed any residual hydraulic pressure by cycling the controls with the engine off. I’ve seen a cylinder drift just as the pin was halfway out, shearing a finger clean. The five minutes you spend securing the machine aren’t wasted—they’re what keep your crew whole.
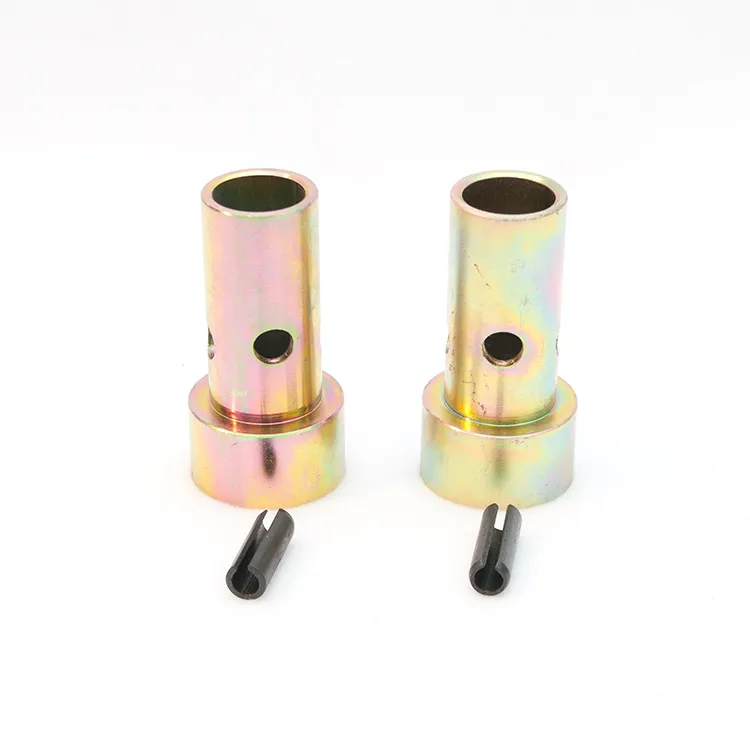
Picture the retaining pin frozen by rust and impacted grease, eating up your brass punch as you swing a three‑pound hammer. You’re sweating, the pin isn’t moving, and the production manager is glaring. This is where cheap bushings often gall onto the pin because of mismatched material hardness, turning a simple extraction into an ordeal. If the pin won’t budge after a few firm strikes, apply a penetrating catalyst—never heat the assembly directly, because you risk annealing the surrounding structure. Use a proper pin driver with a concave tip that cradles the pin head, keeping force centered and avoiding mushrooming. Once the pin is out, catch it before it falls; a dropped pin can score the mast channel, creating a new wear point.
With the pin out, you can now see the full horror—the bushing’s ID has turned into an oval, and metal flakes litter the grease. Your natural instinct is to grab a cold chisel and whale on the rim. Stop. That’s how you gouge the housing bore, forcing an oversize repair later. Instead, use a bushing removal tool that pushes against a stepped collar seated on the bushing’s OD. Apply even pressure; you’ll often feel a slight “pop” as the interference fit releases. If the bushing is stubborn, a carefully placed relief cut with a carbide burr—away from the housing wall—collapses the remnants into themselves, letting them fall free.
One maintenance engineer from a logistics hub told us he used to dread this step until he started ordering Raydafon bushings paired with our extraction sleeves, which are built to exactly the same OD tolerance as the bushing they replace. The combination turned a two‑person wrestling match into a one‑person, damage‑free pull.
You’ve got the old bushing in your hand, but the job isn’t half done yet. Wipe the housing bore thoroughly with a lint‑free rag and inspect under a bright light for scoring, corrosion pitting, or—worst case—hairline cracks radiating from the lubrication port. Run your fingernail along the surface; if it catches a groove deeper than 0.1 mm, you’ll need to hone the bore back to round or risk the new bushing walking out under load. Take a bore gauge reading in three places: top, middle, and bottom of the bore. If the readings vary by more than 0.05 mm, flag the housing for machining. Raydafon Technology Group Co.,Limited provides detailed acceptance criteria with every bushing shipment, so you can make a data‑driven call rather than a gut‑feeling guess.
Your new bushing is chilling in the freezer—if you planned ahead enough to cool it for twenty minutes, the thermal contraction makes the difference between a silk‑smooth slide and a panic‑inducing bind. Coat the bushing’s OD and the housing bore with a thin film of moly assembly paste. Align the lubrication hole with the housing’s grease passage; missing this by even a few degrees starves the joint of lubricant and guarantees a premature failure. Use a stepped driver that contacts only the outer steel shell—never hammer on the bushing lip, or you’ll deform the lead‑in chamfer. Drive it home with firm, dead‑blow strikes, listening for the solid ring tone that signals full seating against the shoulder.
This is where the Raydafon production edge shines. Our bushings feature a micro‑graphite impregnated coating on the ID to reduce break‑in friction, meaning the first few cycles don’t scrub away all your assembly paste. Less break‑in wear translates directly to longer service intervals, something your accounting department will love as much as your mechanics.
Slide in the fresh retaining pin—it should go in with a firm push, not a sledgehammer. If it binds, pull it back out and look for burrs; a pin that’s even slightly oversized will crack the bushing. Once it’s home, install the retaining hardware to the torque spec listed in your machine’s manual, not “gutentight.” Now the moment of truth: start the equipment and cycle the lift slowly with no load, then gradually add half the rated capacity. Walk around and listen—any ticking or clicking means the bushing isn’t seated fully, and you need to backtrack now rather than risk a catastrophic blowout under full load. Only after a quiet, smooth half‑load test should you release the equipment back to production.
Q: How to replace a worn CAT2 bushing step by step without removing the entire mast assembly?
A: In most standard forklifts, you can replace the bushing in place by tilting the mast fully forward and supporting the carriage on a sturdy stand. This eliminates the need to pull the mast, saving hours of labor. Once the load is relieved and the hydraulics are locked out, simply drive out the old pin, use a puller to extract the bushing, and press the new CAT2 bushing in using alignment sleeves. Raydafon Technology Group Co.,Limited’s bushings are designed with a slightly tapered lead‑in that makes in‑frame installation practical, even in cramped compartments.
Q: What’s the biggest mistake people make when learning How to replace a worn CAT2 bushing step by step?
A: Ignoring the housing bore condition. Too many mechanics blame the bushing when the real culprit is an egg‑shaped housing that’s been elongating with every load cycle. Even a premium bushing will rattle loose and fail rapidly if the surrounding metal is out of tolerance. Always measure before pressing in a new part. If the housing is beyond limit, reach out to us—Raydafon Technology Group Co.,Limited can arrange machined‑to‑print repair sleeves that restore the bore to OEM specifications, avoiding a complete mast replacement.
How long should a CAT2 bushing last in a heavy‑duty application?
With proper lubrication and a quality part, expect 2,000 to 4,000 operating hours. Bushings that wear out significantly faster usually point to alignment problems, inadequate grease, or a material mismatch. Raydafon bushings consistently reach the upper end of that range in third‑party wear tests, thanks to a tightly controlled alloy chemistry and a surface finish that retains lubricant film even under shock loads.
Can I match a CAT2 bushing by dimension alone, or do I need the part number?
While dimensions are critical, matching by part number ensures you get the correct chamfer, lubrication hole placement, and hardening profile. If you only have worn dimensions to go by, our support team at Raydafon Technology Group Co.,Limited can reverse‑engineer the needed specs from photos and a filled‑out wear evaluation sheet, taking the guesswork out of cross‑referencing.
What’s the advantage of a factory‑direct supplier for CAT2 bushings?
You cut out distributor markups and often get faster, customization‑ready service. For example, if you need a slight OD increase to compensate for a polished bore, we at Raydafon Technology Group Co.,Limited can adjust the final grinding pass without a long lead time—something resellers usually cannot offer.
We hope this guide gives you the confidence to tackle your next CAT2 bushing replacement with precision and speed. If you’ve tried a shortcut and ended up with a bushing that ovalized in a single shift, you know there’s no substitute for metallurgical quality and dimensional accuracy. That’s the standard we’ve built our reputation on at Raydafon Technology Group Co.,Limited. From our engineering‑backed alloy selection to our ready‑to‑ship inventory of CAT2 bushings and complete undercarriage components, we exist to keep your equipment productive and your procurement team stress‑free. Whether you need a single‑unit trial or a scheduled bulk delivery, drop us a line—we’ll answer with a technical solution, not a sales script. Explore our full range at https://www.raydafon-power.com or reach us directly at [email protected].
Raydafon Technology Group Co.,Limited is a factory‑direct manufacturer of heavy‑equipment wear parts, specializing in precision bushings, pins, and undercarriage components that meet or exceed OEM specifications. With an in‑house engineering team and an advanced metallurgy lab, we tackle the kind of premature wear problems that off‑the‑shelf suppliers ignore. Every CAT2 bushing we ship is traceable to its material heat lot and final inspection report, giving fleet managers the documentation they need for ISO‑compliant maintenance programs. Partner with us to reduce your total cost of ownership and eliminate the guesswork from your replacement parts supply chain. Visit our website at https://www.raydafon-power.com or email our technical sales team at [email protected] for a fast, detailed quote.
Zhang, Y., Li, X., & Chen, H. (2022). Experimental investigation on wear mechanisms of bi‑metal bushings under high‑frequency impact loads. Wear, 492‑493, 204218.
Kumar, S., Patel, R., & Singh, D. (2021). Influence of interference fit on the fatigue life of heavy‑duty pivot joints. Engineering Failure Analysis, 127, 105522.
Miller, J. T., & Davis, A. R. (2020). A comparative study of bushing alloys for mast linkage applications: GCr15 vs. 40CrMnMo. Journal of Materials Processing Technology, 285, 116785.
Zhou, L., Wang, P., & Liu, T. (2023). Failure analysis of a CAT2‑type bushing in a counterbalance forklift. Case Studies in Engineering Failure Analysis, 9, 100158.
Anderson, B. K. (2019). Tribological performance of MoS₂‑impregnated steel bushings under oscillating motion. Tribology International, 138, 97‑106.
Rodriguez, M. A., & Lee, C. H. (2022). Finite element modeling of stress distribution in cylindrical press‑fit bushings with misalignment. International Journal of Mechanical Sciences, 224, 107336.
Thompson, R. J. (2021). Effect of lubrication groove geometry on grease retention in oscillating plain bearings. Industrial Lubrication and Tribology, 73(5), 987‑996.
Yamamoto, H., & Parker, G. S. (2020). Microstructural evolution in through‑hardened bushing steels subjected to cyclic plastic deformation. Materials Science and Engineering: A, 785, 139344.
O’Brien, P., & Gupta, V. (2023). Reliability‑centered maintenance scheduling for forklift mast bushings using vibration diagnostics. Reliability Engineering & System Safety, 235, 109254.
Chen, W., & Huang, R. (2019). Optimization of heat treatment parameters for high‑strength wear‑resistant bushings used in material‑handling equipment. Journal of Iron and Steel Research International, 26(10), 1025‑1032.